On this blog, I delve into practical AI tools and applications. I like bleeding edge
technology and API's and explore interesting use cases and new tools.
I love Laravel (TALL Stack) ❤️ and all things JS.
May 8, 2024
Single Image Transformations: Exploring Instruct Pix2Pix in Stable Diffusion
What exactly is Pix2Pix? This Stable Diffusion model transforms images based solely on textual instructions. Timothy Brooks, the model’s creator, defines it as “Learning to Follow Image Editing Instructions”. The simplicity of Pix2Pix opens a realm of possibilities for anyone interested in AI-driven image editing.
The Idea: Transform any image with minimal effort.
The Goal: To manipulate images quickly and without any prior editing skills (aka Photoshop).
The Use Case: This exploration started with an aim to automate the generation of YouTube thumbnails by changing facial expressions via simple commands.
The Annoyance: Traditional photo editing requires time and effort I’d rather not spend, and manual edits in Photoshop or inpainting in Stable Diffusion often lead to frustrating cycles of trial and error. 😬
Table of Contents
Set Up InstructPix2Pix
Choose a Base Image
Select an Effective Prompt
Examples of Transformations
Comparisons with Embeddings and epiCPhotoGasm
Step 1: Setting Up the Instruct Pix2Pix Model (MacBook M1)
Side note: All of the following steps were taken on a MacBook M1.
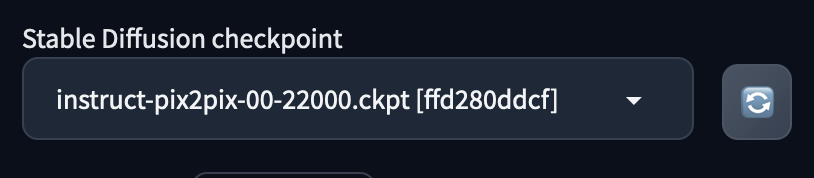
Initially, download the ckpt or safetensors model from the Hugging Face repository and place it in the models\Stable-diffusion directory. Refresh and select the instruct-pix2pix-00-22000 model from the dropdown menu.
Additional note:
I encountered issues using ControlNet with the error message: Cannot recognize the ControlModel. Although it ultimately did not affect the outcomes, to avoid potential issues, I recommend not enabling ControlNet and loading the model directly as a Stable Diffusion checkpoint in case you also get this error.
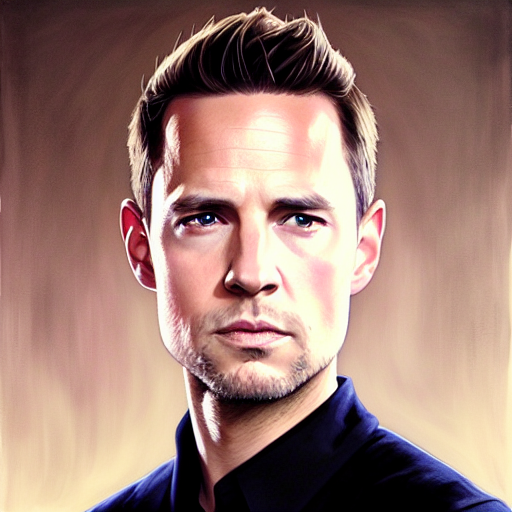
Step 2: Choose Your Base Image
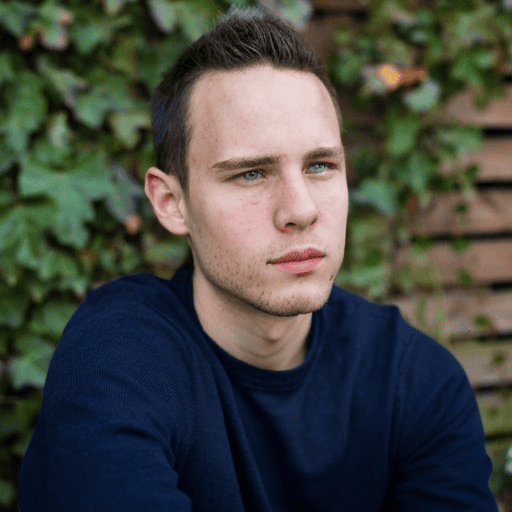
A younger and prettier version of me 😳
Step 3: Crafting Effective Prompts
To maximize the model’s effectiveness, articulate your desired changes as if you were instructing Photoshop. This model excels when directives are precise, whether it’s altering the lighting, adjusting colors, or removing and replacing elements.
Here are some successfully tested prompt examples (credit to Andrew from stable-diffusion-art.com):
Change to style name style, e.g. Change to cartoon style
Make person look like object or person, e.g. Make him look like a dog
Add object, e.g. Add tomatoes to the table top
Replace object with something else, e.g. Replace the water with sand
Put object or person in scene or background, e.g. Put him in latent space
Make it area, country or city, e.g. Make it Berlin
Important: Set the Denoising strength to 1 to ensure the model functions properly.
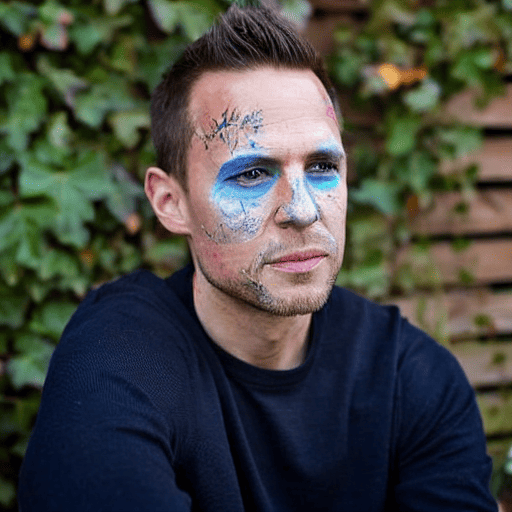
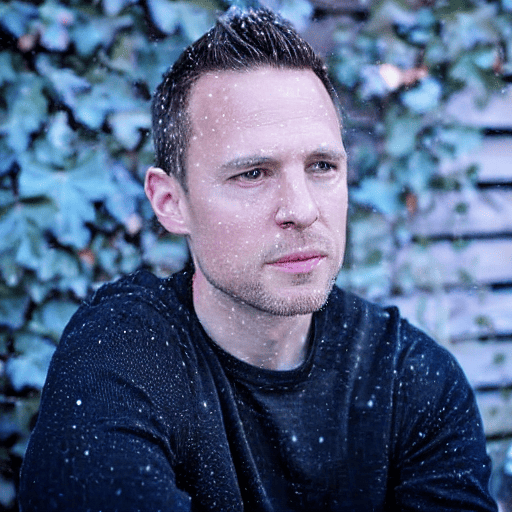
4. Examples
Let’s explore a range of outcomes from successful transformations to… learning experiences. 🤓
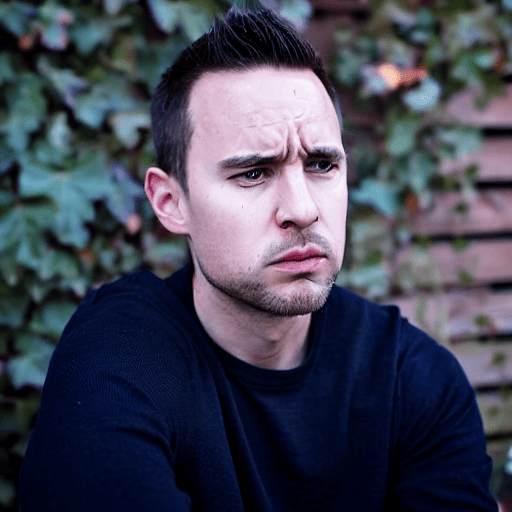
My opinion: Impressive, but it looks almost like there's also a leather bag on the top of the left shoulder. I suppose this is due to the source image being a bit wrinkly in that area.
Observations
Pix2Pix shines in style changes and object replacement but struggles with complex facial expressions and scenery adjustments. The key to make it work often lies in adjusting the Image CFG and CFG Scales based on what the prompt demands. It fails on viewpoint changes and sometimes it fails to isolate the specified object.
If an image doesn’t change at all, usually you’d lower either the Image CFG Scale (try 1.25 or even lower if 1.5 does nothing for you) or increase the CFG Scale of the actual prompt (try 8-9 if 7.5 was your baseline).
Evoking strong emotions from a neutral facial expression is challenging with Pix2Pix. In such cases, I recommend using a custom embedding or checkpoint, as illustrated below.
Takeaways
Challenges: Changing facial expressions is as tough as traditional image editing. Subtle changes are more reliably achieved than complete overhauls.
Strengths: Ideal for straightforward tasks like color changes or background swaps.
Limitations: Struggles with dramatic emotional expressions due to issues with detailing in areas like the mouth and eyes.
Remember, the effectiveness of Pix2Pix can vary dramatically based on the specificity of your prompts and the settings you choose. What works in Photoshop can often be replicated here, albeit with some practice and patience.
Taking It further
Changing Facial Expressions
To more effectively alter facial expressions, an alternative approach using custom embeddings proves more promising.
In order to accomplish this, we need to use another method. I explored several embeddings over at civitai such as Nervous512, Grin512 or Sad512.
Here are some specific emotions tailored for different expressions:
My opinion: Teeth are slightly better, but not great either. We'll have to make the extra effort and use inpainting here as well.
Using inpainting might yield similar results, but it requires more effort to manually create masks for areas like the eyes and cheeks. In contrast, using an embedding automates this process, considering the entire face without the need for detailed manual adjustments.
In Comparison
Let’s compare pix2pix with the smile512 embedding:
My opinion: Rendered a deeper sadness but introduced some unwanted color shifts. I'd say left (pix2pix) is the winner here.
Alternate Approach Using ADetailer and epiCPhotoGasm
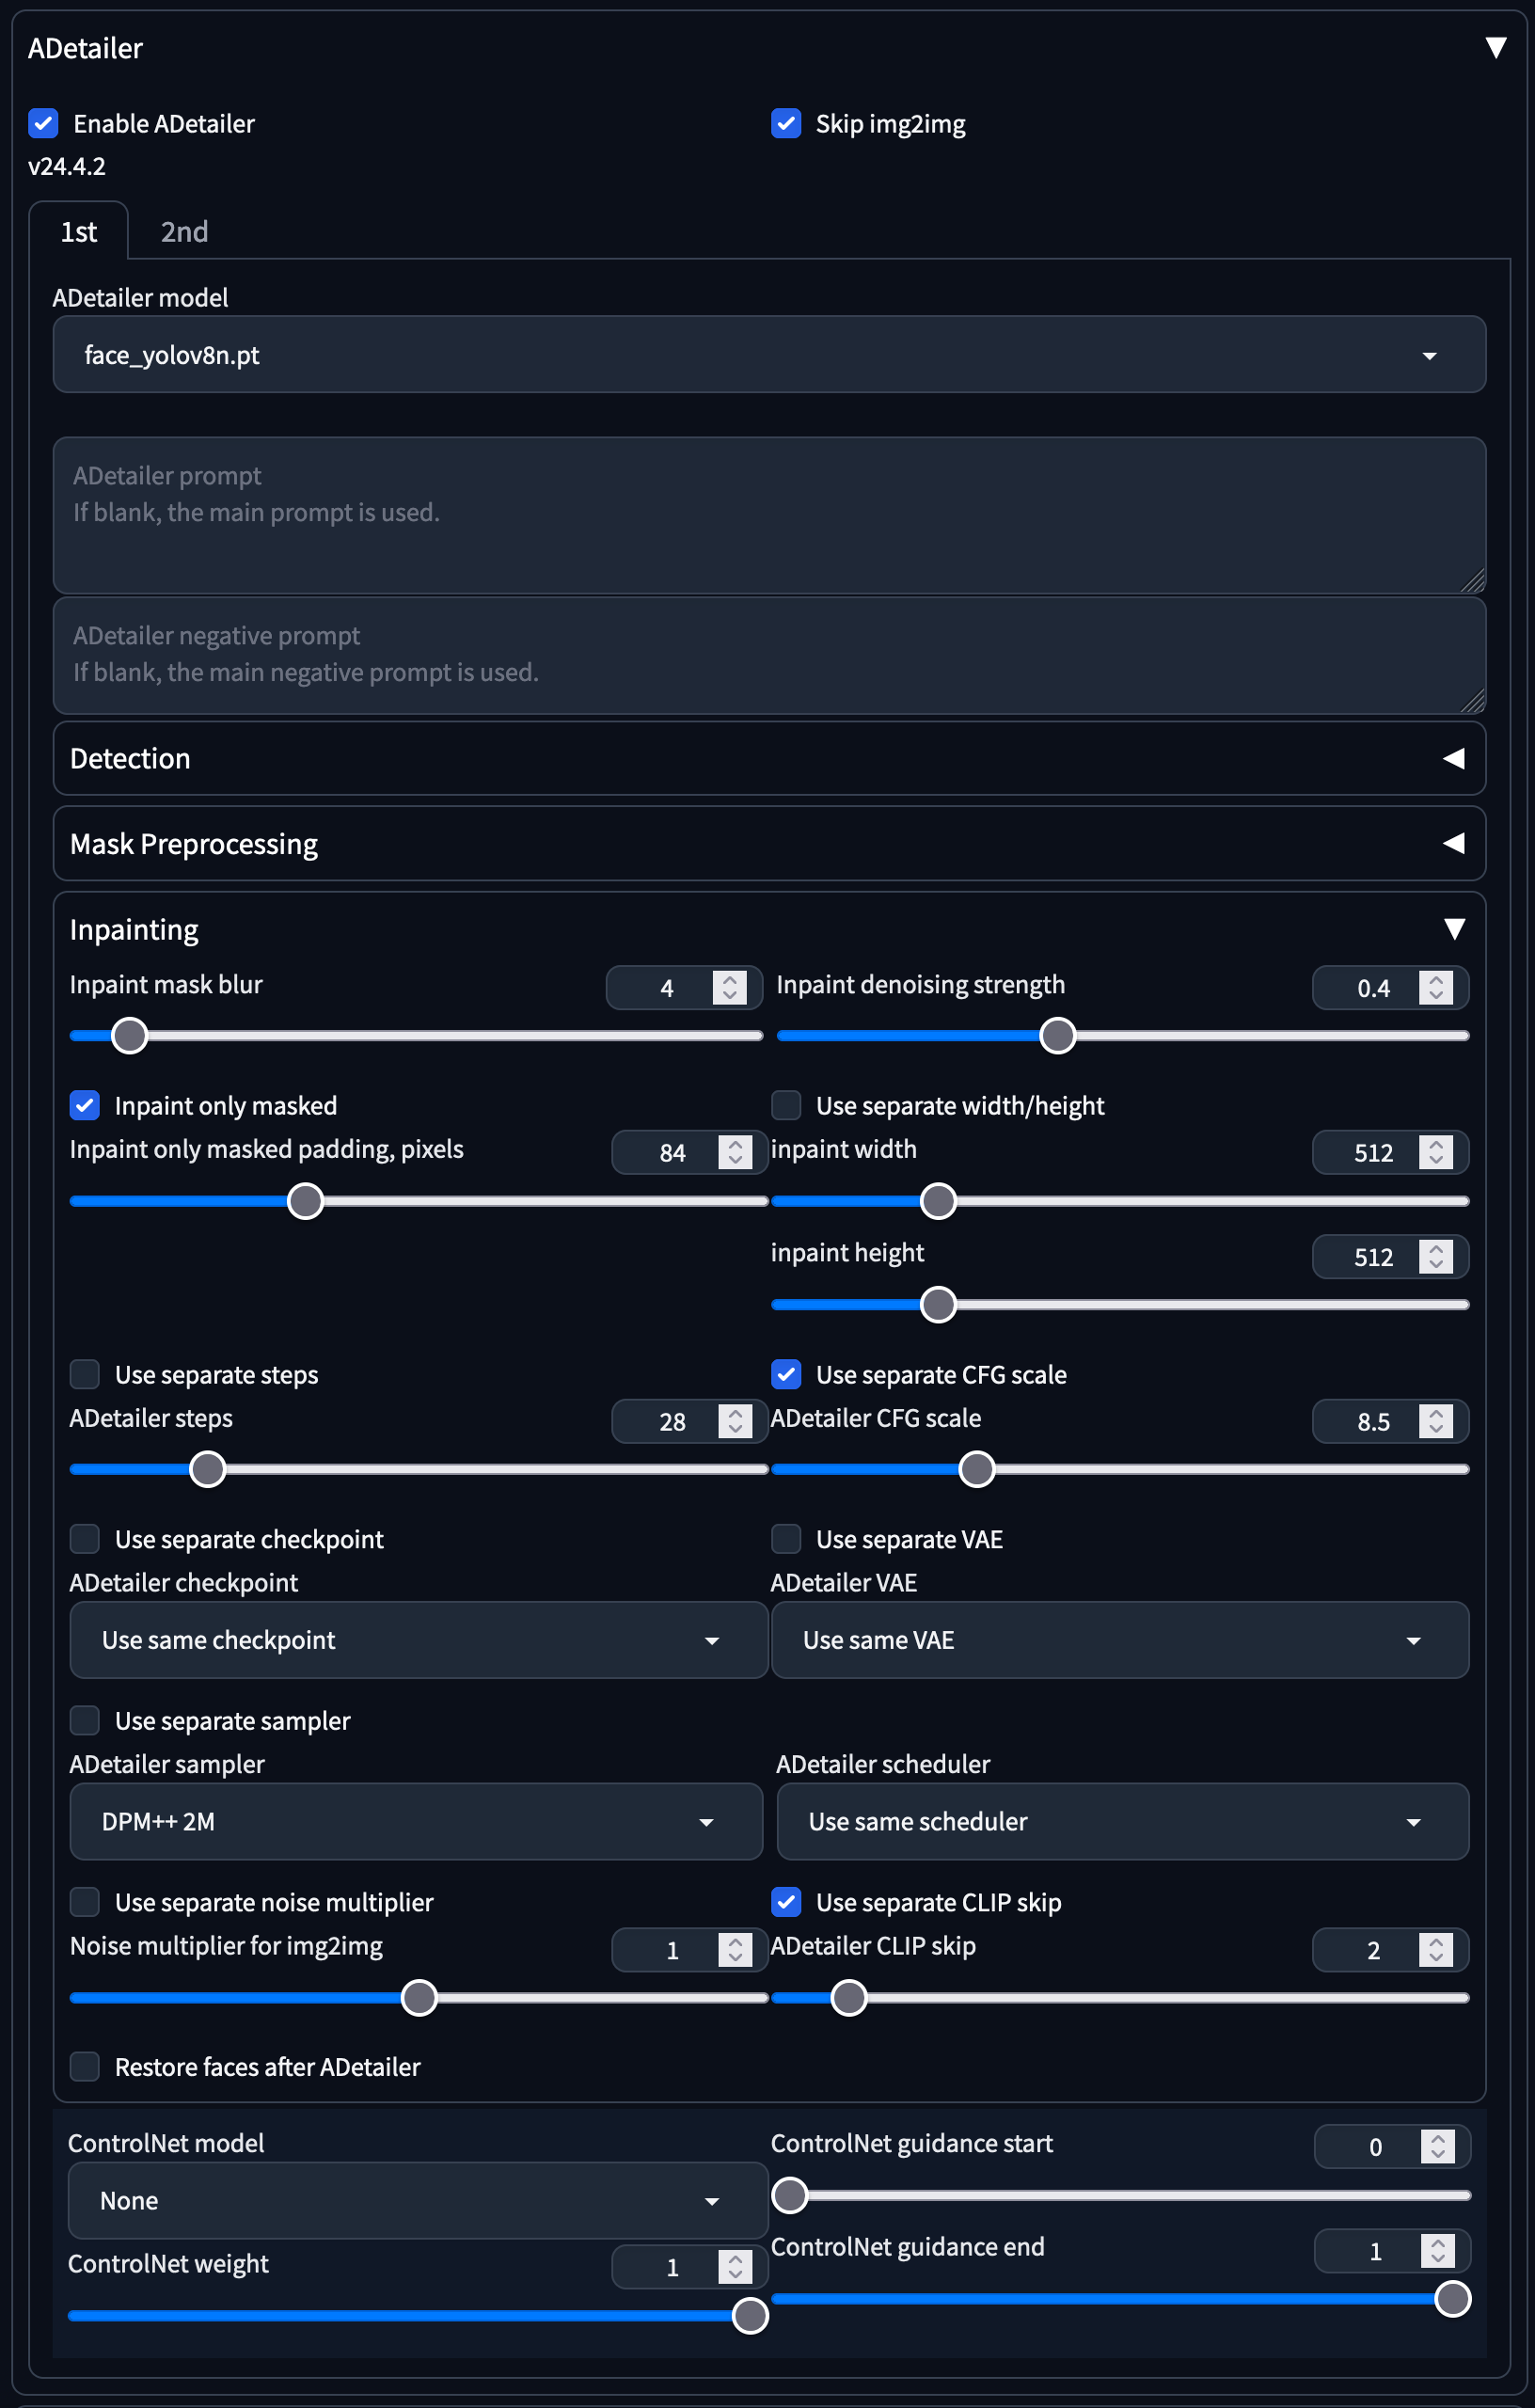
A popular checkpoint on civitai, epiCPhotoGasm, offers an alternate method for facial manipulation. After downloading, place it in your models\Stable-Diffusion folder. ADetailer, utilizing face_yolov8n.pt, focuses modifications on facial features when img2img is enabled—ideal for precise adjustments.
Interestingly, epiCPhotoGasm operates nearly twice as fast as the Pix2Pix model on my setup, showing promising results:
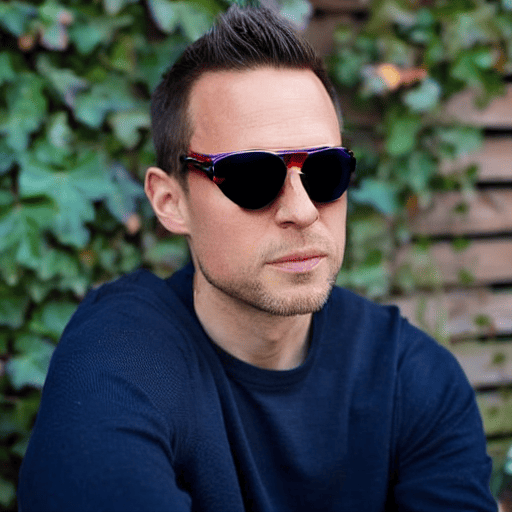
Comparative Outcomes Using ADetailer and epiCPhotoGasm
My opinion: This one was tough for pix2px, as seems to be the case when trying to use strong facial expressions such as shock. epiCPhotoGasm is the clear winner here.
The Inpaint denoising strength is crucial here. The default setting of 0.4 generally works well, but slight adjustments can greatly influence the outcome, sometimes at the expense of character recognizability.
Experiment with Inpaint only masked padding, pixels to potentially achieve a broader range of facial expressions. Increasing this setting to about 100 has proven effective in some of my tests.
Here are the complete settings I’ve used in ADetailer for most of my comparisons:
This model works very well with age manipulation and ethnicities. Here are some examples:
While epiCPhotoGasm has outperformed other methods in terms of speed and ease of use for my specific needs—such as altering facial expressions from neutral to more expressive states—it is not without its flaws. The results, while quick, may not always be reliable enough for applications like YouTube thumbnail generation where accuracy in expression and a flawless result is crucial.
Unfortunately, the current solutions require significant tweaking to meet my needs fully. In my opinion, the currently available methods aren’t quite there yet without going the extra mile or adding a disproportionate ton of effort.
Both of these look promising and may be able to more easily alter facial expressions.
Stay tuned as I’ll be test driving new methods soon.
Alright, that's a wrap. If you want, subscribe for more interesting AI projects and demos such as this.
Enter your email below and get notified when I publish new articles.